
Register hosting and create website project (1)
We will practice how to register hosting and publish website projects in this section. In addition, Khang Web introduces to you the web hosting service Hostinger, one of the best hosting for you to bring your website to global users.

Register hosting and create website project (1)
I. Guide to Registering for Hosting
1/ Introduction
Hosting is where your website's source code and data are stored. Therefore, you need to spend a small amount of money to maintain the hosting and domain name. This cost is negligible compared to the benefits you receive.
There are many hosting services to choose from, but in this guide, Khang Web recommends Hostinger. This is a hosting service that Khang Web rates as having good quality and fast support in your own language.
And if your website targets a multinational market, the hosting service you choose must have servers located in many places. Hostinger meets this requirement, and its web hosting service price is extremely reasonable.
Get up to 40% off service fees and a bonus custom domain name.
Or you can scan the QR code on the screen.

2/ Purchase
After accessing the Hostinger homepage, select "Claim Deal."

There are many plans to choose from, but Khang Web suggests choosing the "Business" plan.
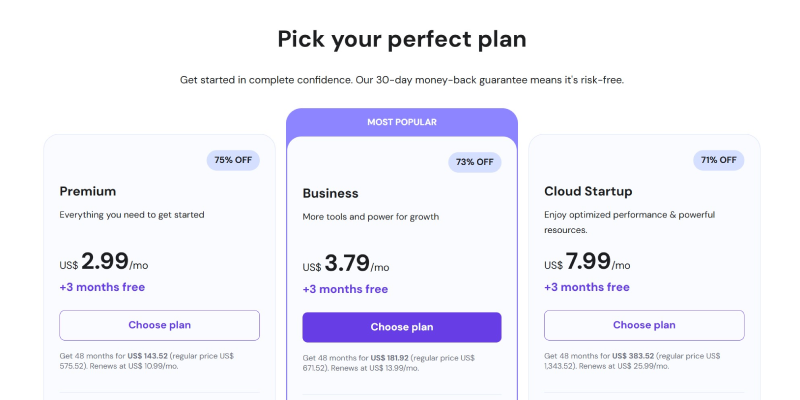
This is suitable if your website has more than 50,000 products, or if you want to save more by having two websites sharing the same hosting.
After the order is successfully paid, you will be redirected to the setup page.
II. Creating a Project
Follow these steps exactly as I do.
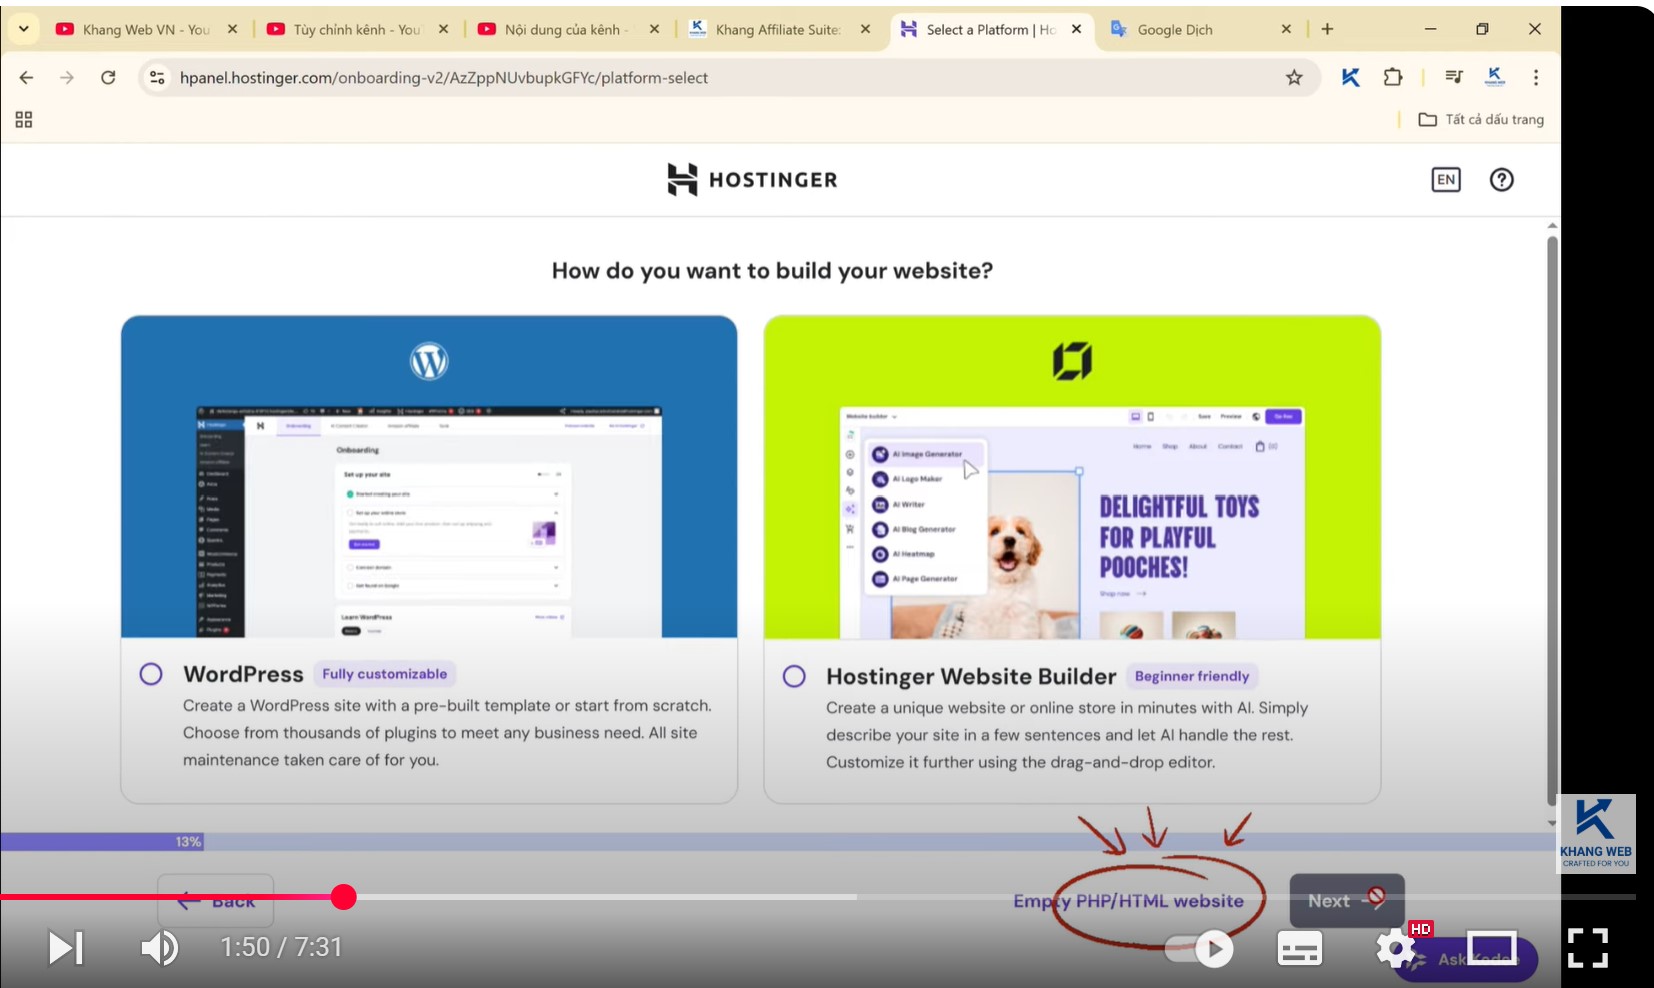
Select "Create a website."
At this step, do not select any option. Instead, click on the "Empty PHP HTML" link.
1/ Domain Registration.
You will receive a free domain name if you paid for the service using the referral link from Khang Web above.
Choose your domain name,
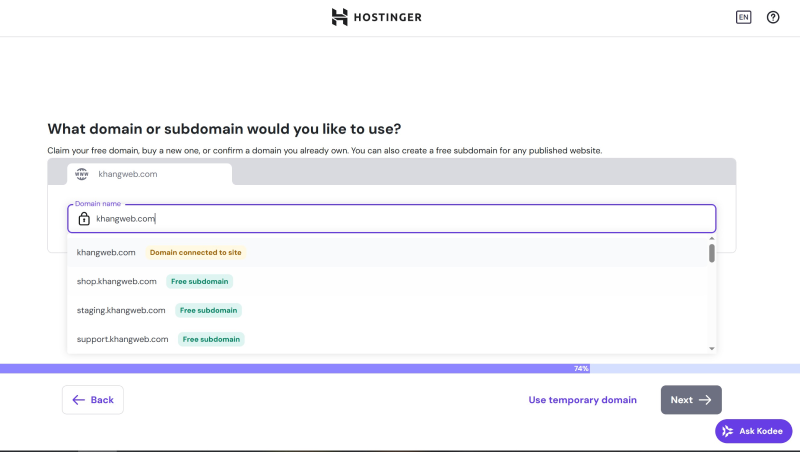
In the next steps, we will register ownership for the domain, so you need to fill in accurate information.
Finish the registration and wait for the system to confirm.
Access your email and confirm.
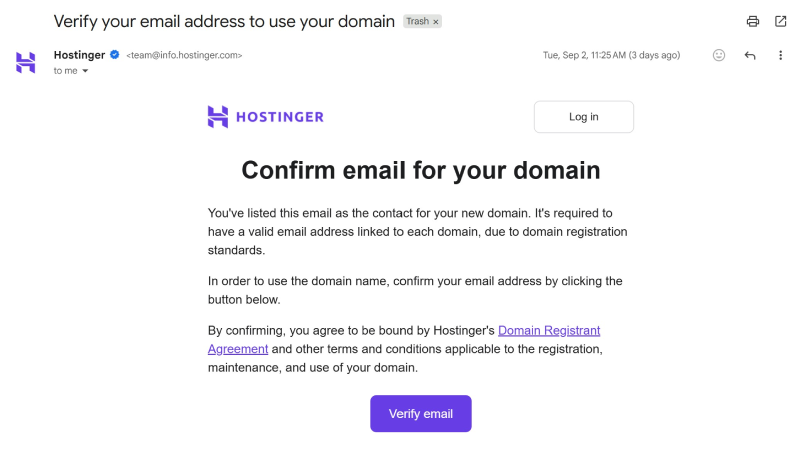
After that, you will be taken to the project management page.

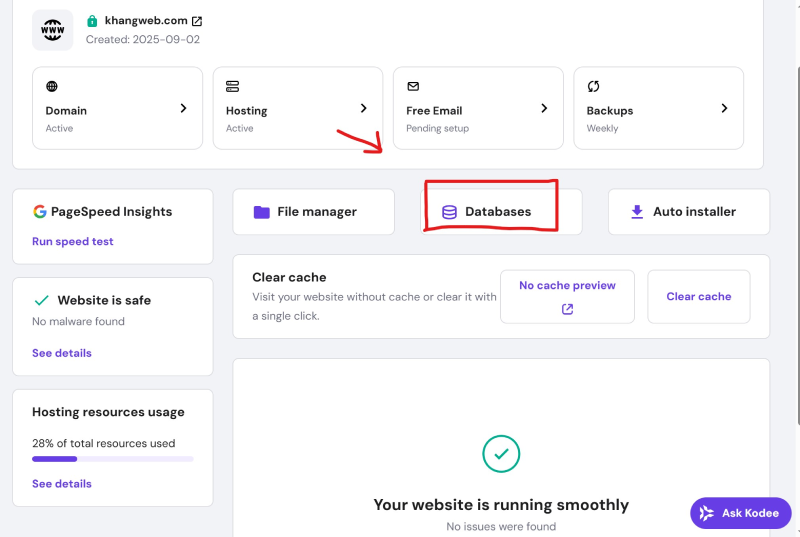
2/ Creating a Database
On the Dashboard page, click "Databases."
Enter the basic database information as you wish and remember it.
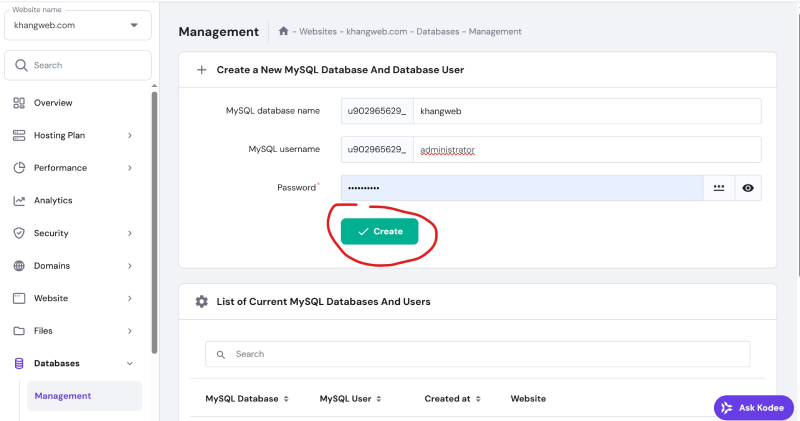
Absolutely do not provide this information to strangers.
3/ Creating a Project
Watch the tutorial video
4/ Setting up the .env file.
The .env file is where you configure the basic information for a website. You don't need to understand it in depth, just follow the steps from Khang Web.
Note: write everything without spaces after the "=".
Language codes are shown below. Contact Khang Web if you want to learn more.
| Language | Code |
|---|---|
| Vietnamese | vi |
| English | en |
| French | fr |
| German | de |
| Japanese | ja |
| Spanish | es |
After that, save the .env file.
5/ Creating the .htaccess file
This file will redirect the browser to the directory containing the website's content.
Click "add a new file" and enter ".htaccess".
Then, open this file and enter the information below.
After that, save the file and go to your website.
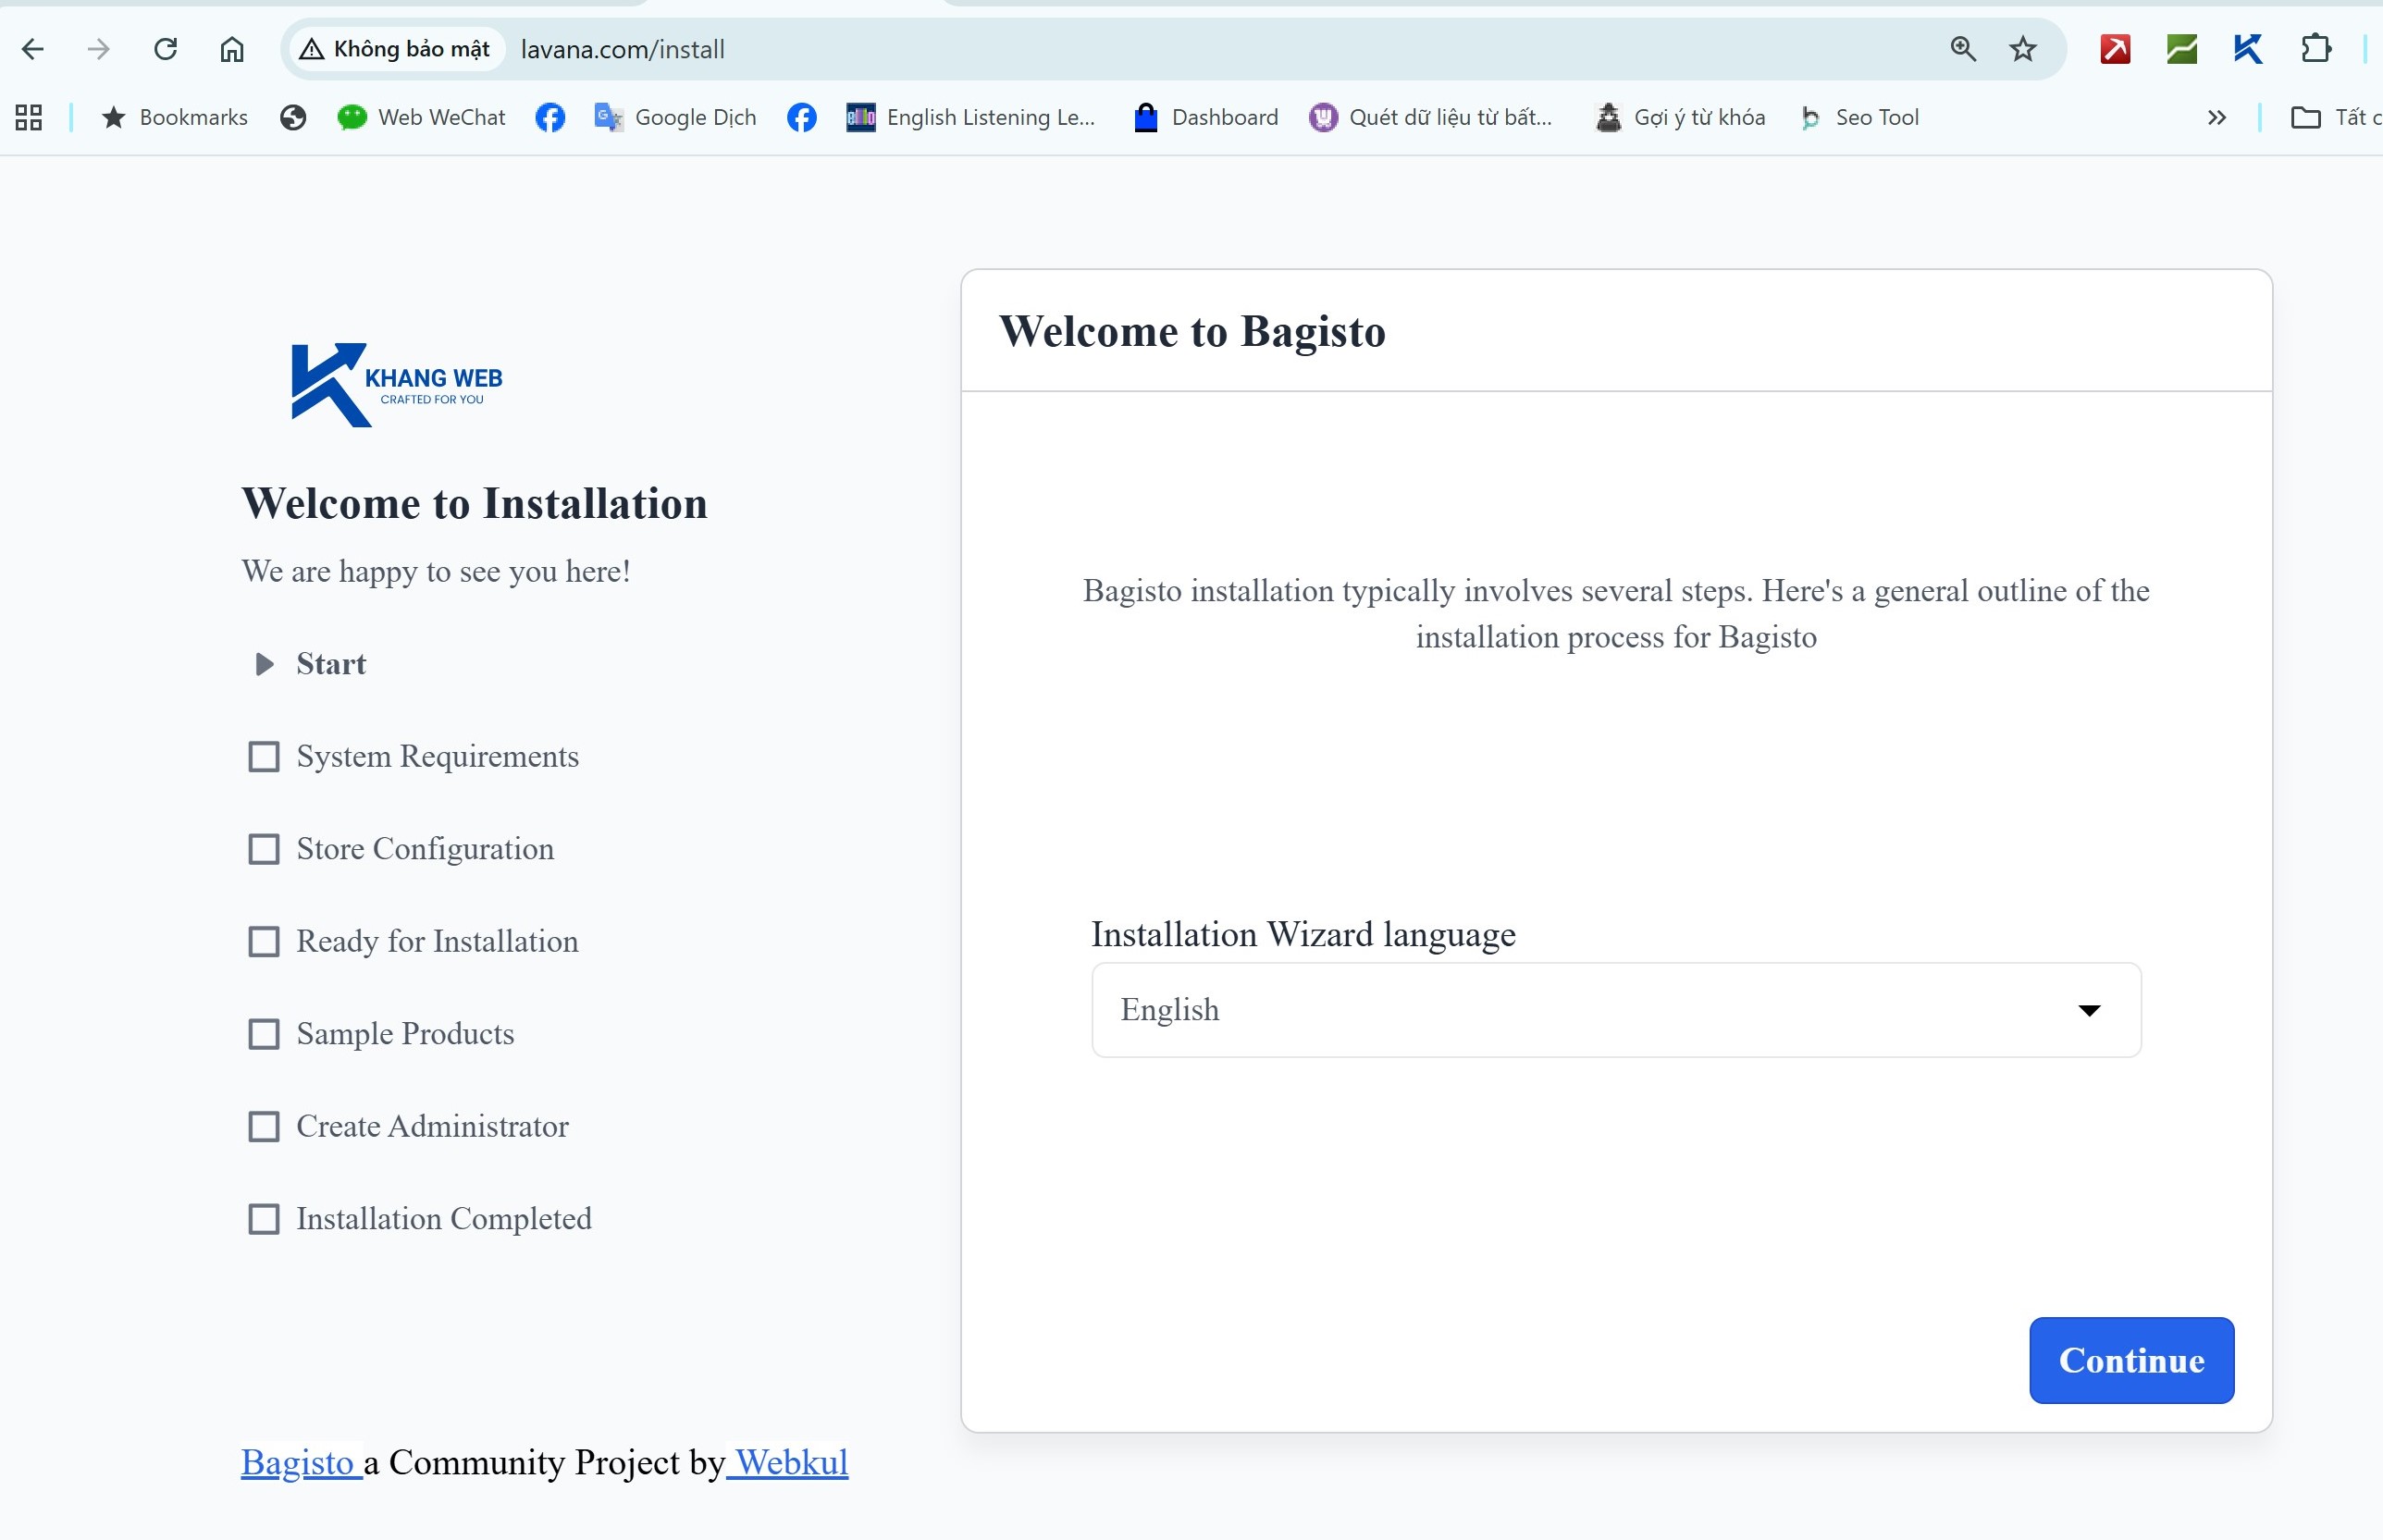
6/ Completing the Setup
Access https://your_website/install
If it displays as shown on the screen, you have completed the hosting setup.
Leave a Comment